Friday Photo of the Week: February 12th.
Made it back to work this week so less time on my photos…sigh. My photo for this week is one I took in New Zealand in September 2009. I stayed over at my cousin Glenda’s house for a couple of nights and one morning in the kitchen area I noticed the sun shining through the venetian blinds and the shadows they cast on a nearby chair.
I like shadows images because at times the subject the shadow falls on can change and become something else which is what I found with the chair at Glenda’s.
The image below is one of the few I took.
Friday Photo :February 5th 2010
The above photo is my Friday photo but I added the ones below to demonstrate what I have been doing over the last week.
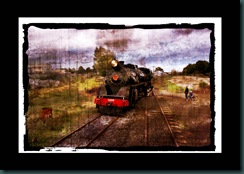
The past week I’ve spent at home nursing a broken clavicle, the result of a fall off my pushbike. I was riding because I am wanting to get riding fit for Cycle Queensland in September of this year. As I been unable to do very much I’ve spent a lot of time in front of the computer learning how to use Photoshop Elements. The above image is one I have played with, with adding texture layers. The original image started life looking like this one below,

So far I have played with 7 different images. One of the other images I used was a image I had converted to black and white then selectively brought back areas of colour within the picture. The original image I took near Bellechaume where JP’s brother lives. The buildings are old brickworks.


The next time I played with this image I selectively coloured [or as it is sometimes called popping colour] some areas. Unfortunately at the time I didn’t know about dual conversion or layer stacking so the sky is overexposed.
It was this image I used to play with with adding textures.


